 Tell me this hasn’t happened to you: you’re cruising along on your project, maybe cutting out fabric with your rotary cutters - then you hit the end of the cutting mat and need your shears… hmmm, where did you last set those down?? Maybe they are over by your machine? Nope. Ugh.
My big problem is with rulers, absentmindedly putting them down in random places when I’m in “the zone”. Where’s my french curve? Ah, found the big aluminum hip curve but what I really need is the small clear one! The pains.
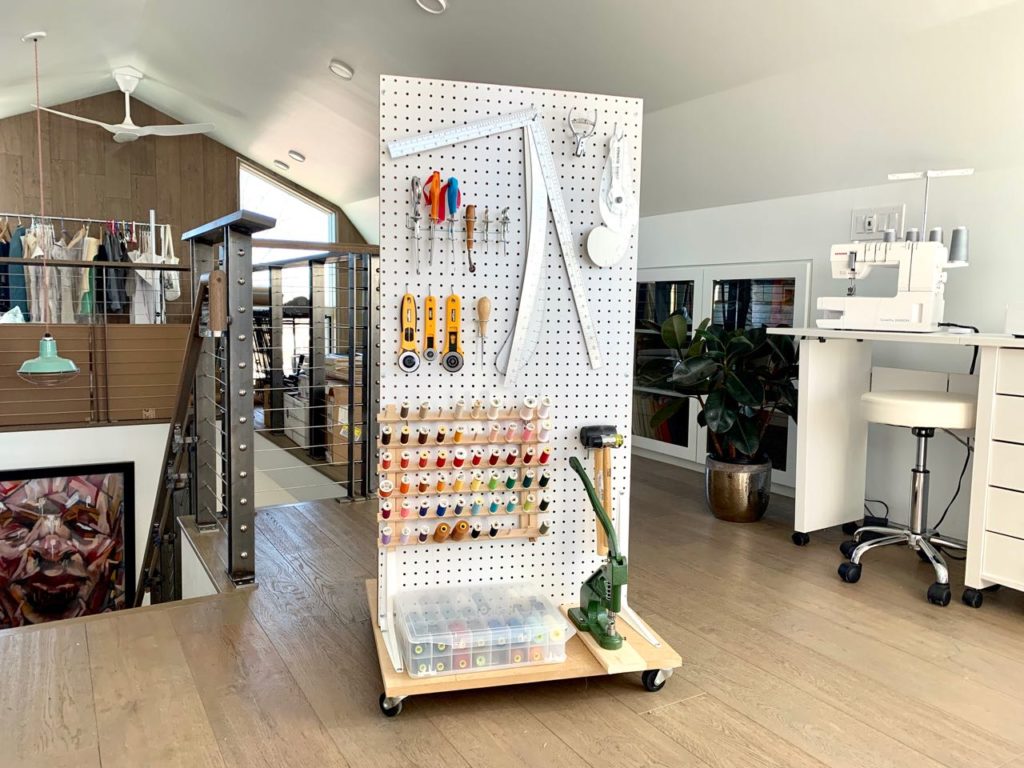
I think I’ve found the perfect DIY solution: a rolling, vertical tools caddy! To be fair, this was not my idea. I stole it from my awesome father in-law who built one for his workshop and was lovely enough to make me one just like his.
Since then, I’ve figured out how to build them on my own in an afternoon - let me show you how!
Tell me this hasn’t happened to you: you’re cruising along on your project, maybe cutting out fabric with your rotary cutters - then you hit the end of the cutting mat and need your shears… hmmm, where did you last set those down?? Maybe they are over by your machine? Nope. Ugh.
My big problem is with rulers, absentmindedly putting them down in random places when I’m in “the zone”. Where’s my french curve? Ah, found the big aluminum hip curve but what I really need is the small clear one! The pains.
I think I’ve found the perfect DIY solution: a rolling, vertical tools caddy! To be fair, this was not my idea. I stole it from my awesome father in-law who built one for his workshop and was lovely enough to make me one just like his.
Since then, I’ve figured out how to build them on my own in an afternoon - let me show you how!
Why this caddy is awesome
1 - See every option all at once
The vertical arrangement allows you to see all your tools and notions at once so you can quickly grab what you need. No digging around in drawers. No mental overhead remembering where things are hiding. Makes cleanup a snap too because everything has its place.
2 - Moves to where you need it
When you’re working, move it to within arm’s reach - next to you at the cutting table, sewing machine, or pressing area. When you’re finished, push it next to the wall or in a corner out of the way. I like that I can position my caddy so I can select my thread in bright sunlight but move it out of the sun when I’m done.
3 - Small footprint for small spaces
Again, the vertical design is key. The most underutilized area in small rooms is vertical space and this dual-sided caddy makes the most of it. Plus, the small rolling base can also be used to hold small items.
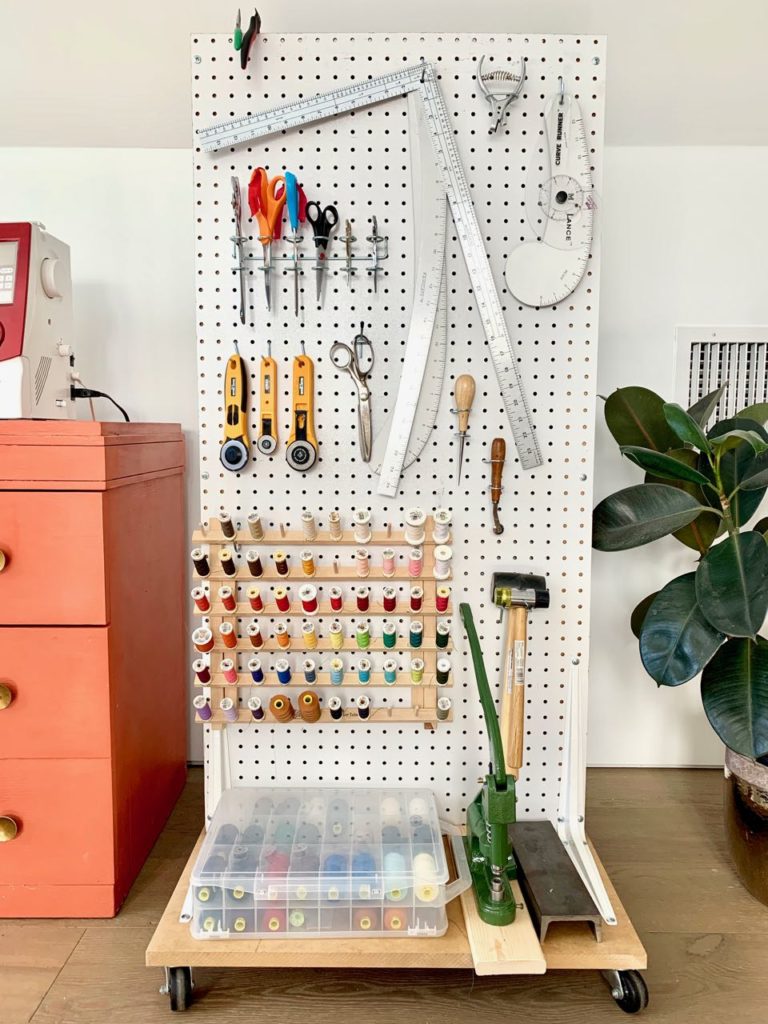
4 - Easily reorganized
Yay for pegboard! You can experiment with different tool arrangements and see what works best! One side for cutting and design tools, another for thread or perhaps a mood board? Make it your own. For inspiration, definitely check out Closet Case’s sewing studio pegboard - love the cute plant accent!
How to build your caddy
You can make this easy project on the cheap with off-the-shelf materials in about an hour or two. It requires almost no cutting or special tools outside of a cordless drill. Start by gathering up these materials at your local hardware store:
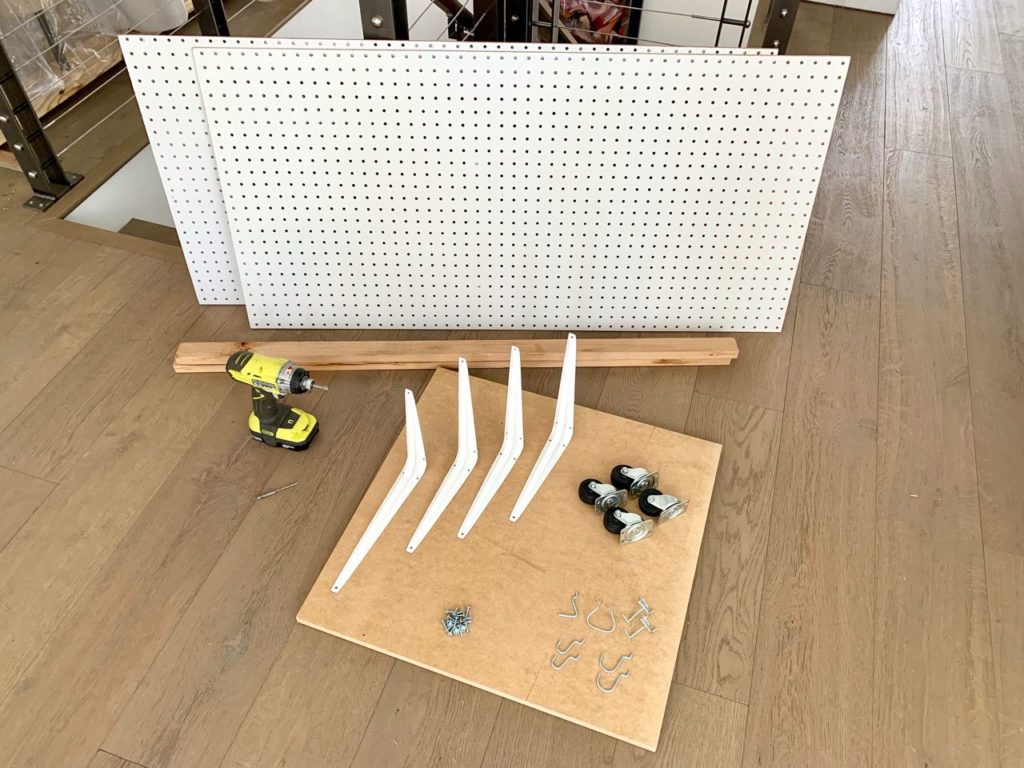
- 2 - 2’ x 4’ pre-cut pegboards
- 2 - 4 ft pieces 1” x 2” (frame) - ask the nice folks at the hardware store to cut an 8 ft piece in half for you!
- 1 - 2’ x 2’ x 3/4” pre-cut plywood or MDF (base)
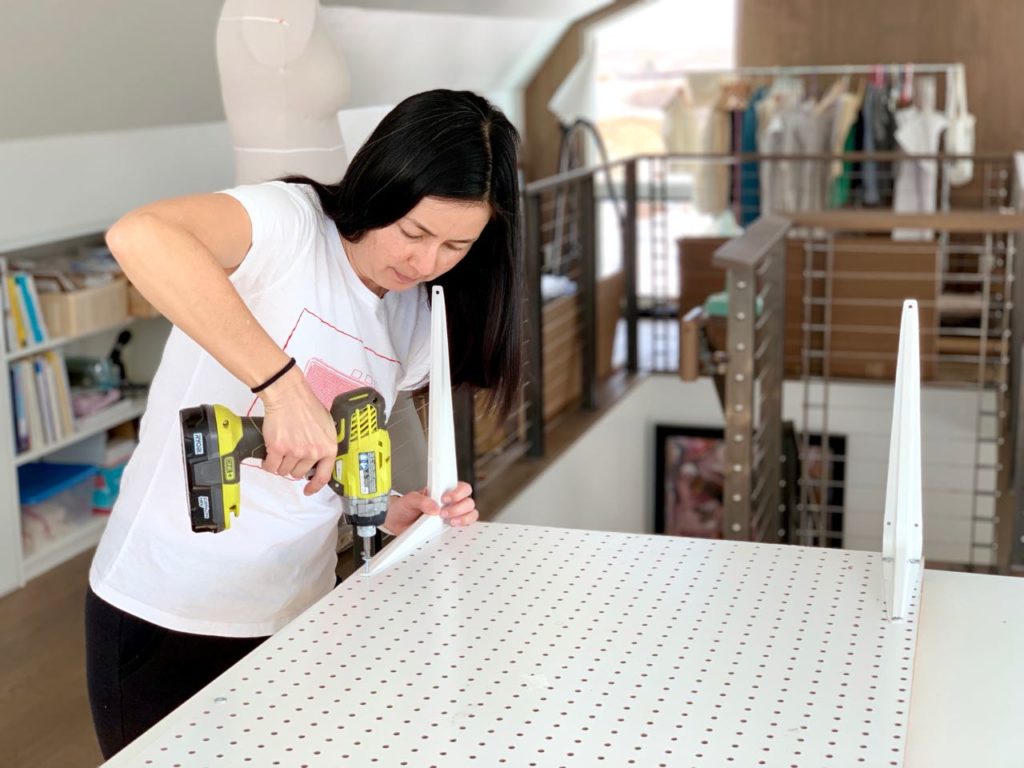
- 4 - 10” x 12” L-shaped shelf brackets
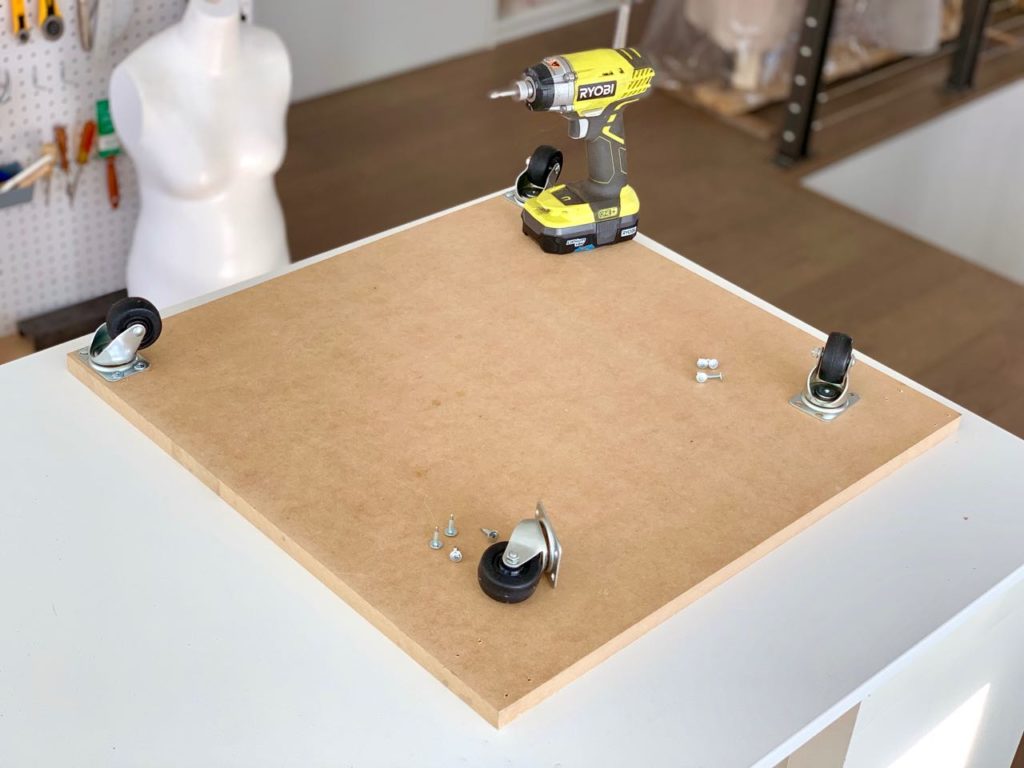
- 4 - swivel (not fixed!) castor wheels with mounting plate for 4 screws
-
8 x 3/4” self-drilling lath screws (or similar)
- pegboard organizing accessories
Tools you will need:
- electric handheld drill
- screwdriver bit (Phillips or flat head to match screws)
- drill bit for pilot holes (optional - here’s how to pick the right size)
How to assemble
- Screw the pegboard to the 1”x2” pieces using 4 screws.
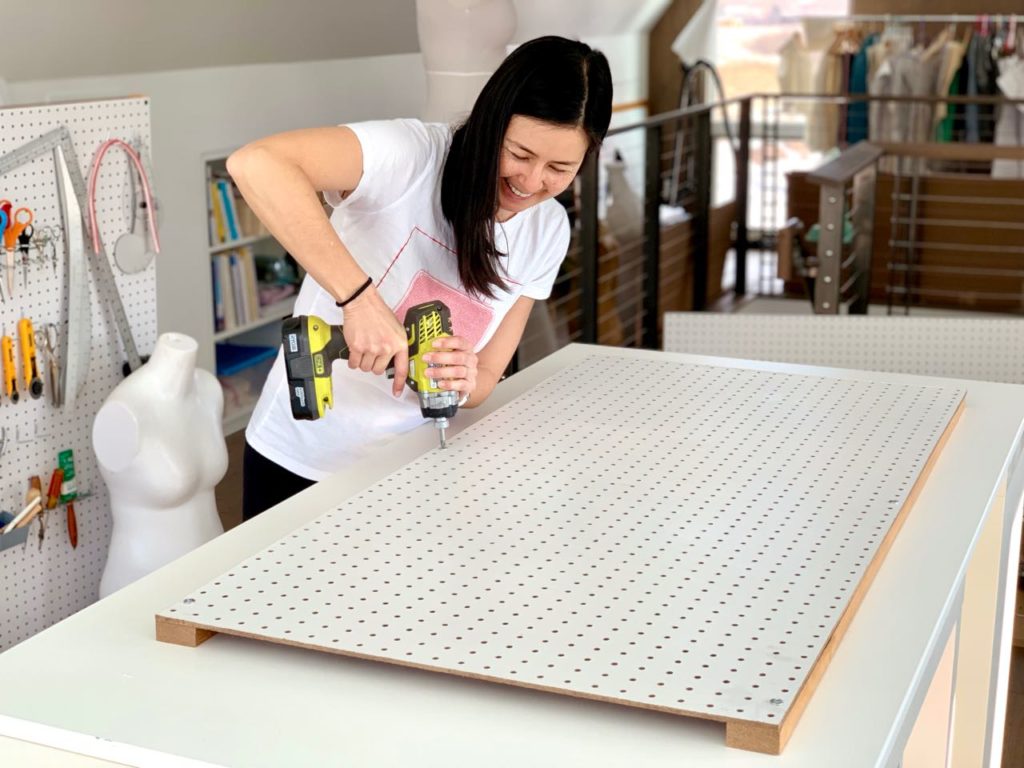 Screws go here, 4 per side:
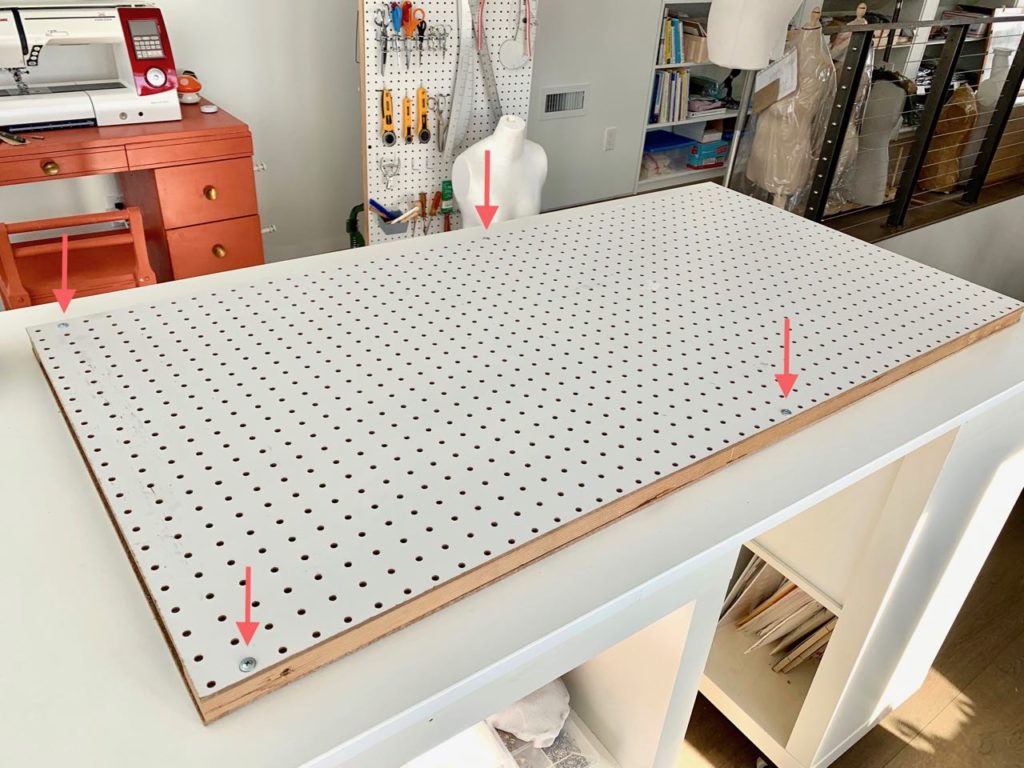
- Turn it over and attach the other piece of pegboard just as you did for the first one.
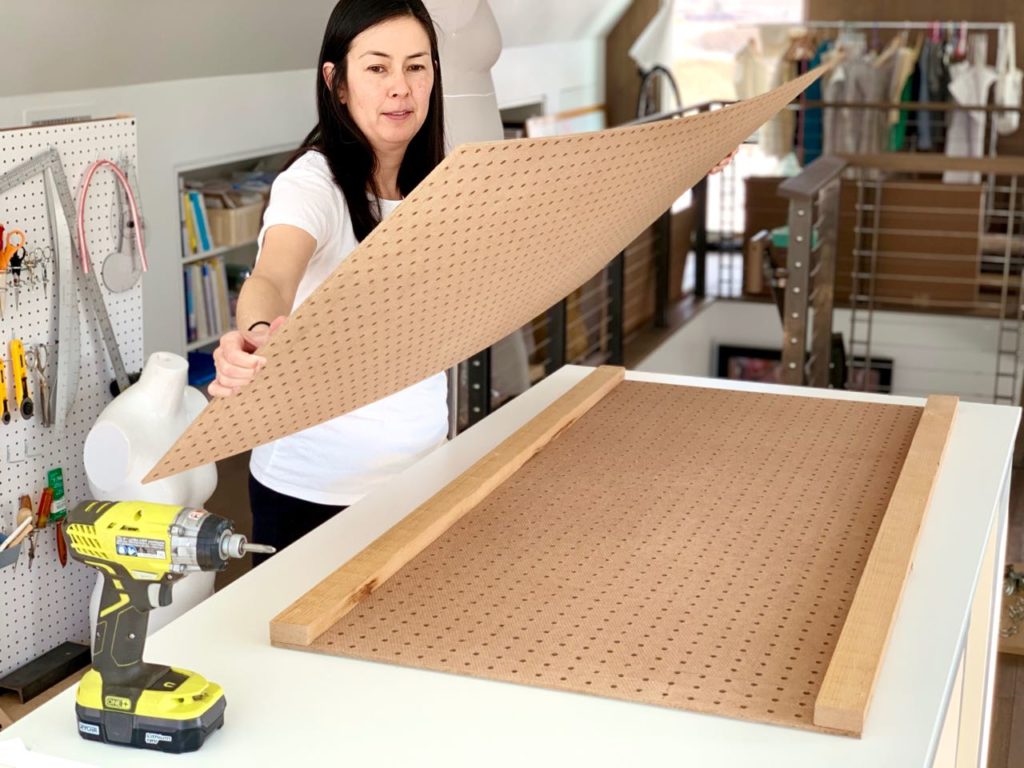
- Attach the long ends of the supports to the bottom of pegboard assembly, at the end without the screws.
- Screw down the castors to the underside of the base at each corner. (Optional: drill pilot holes before inserting the screws, makes it a little easier)
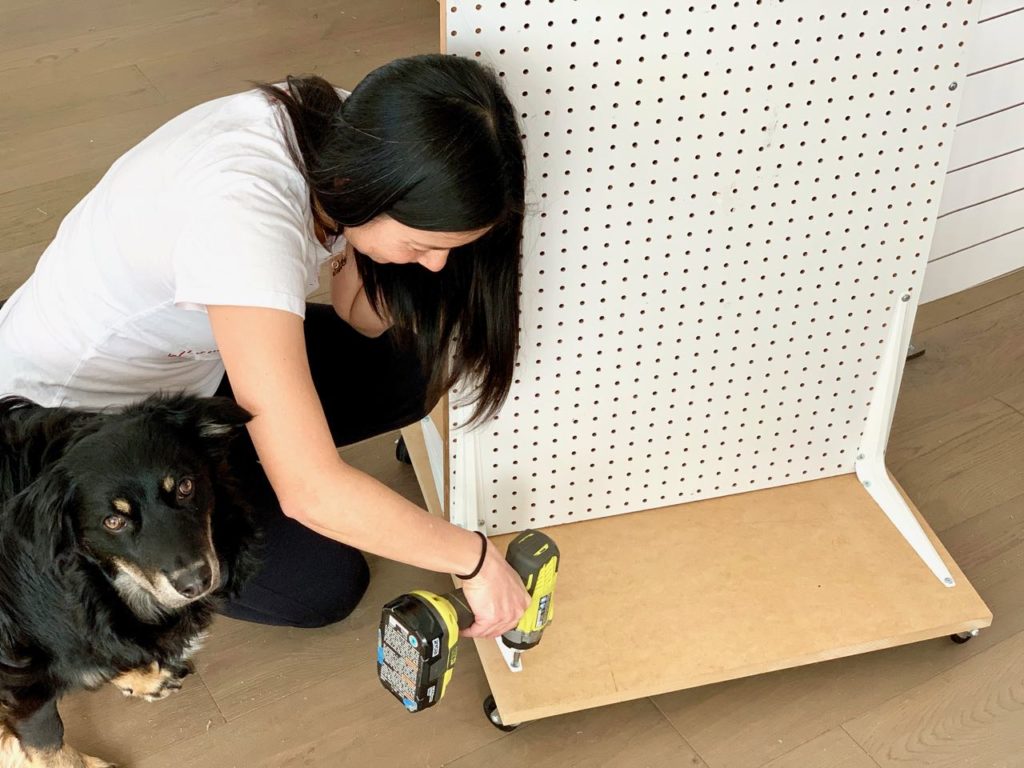
- Attach the pegboard to the base (with or without the help of a furry friend). Again, pilot holes are optional here.
- Load ‘er up with all your sewing tools and goodies using the various pegboard organizing accessories - you’re done!
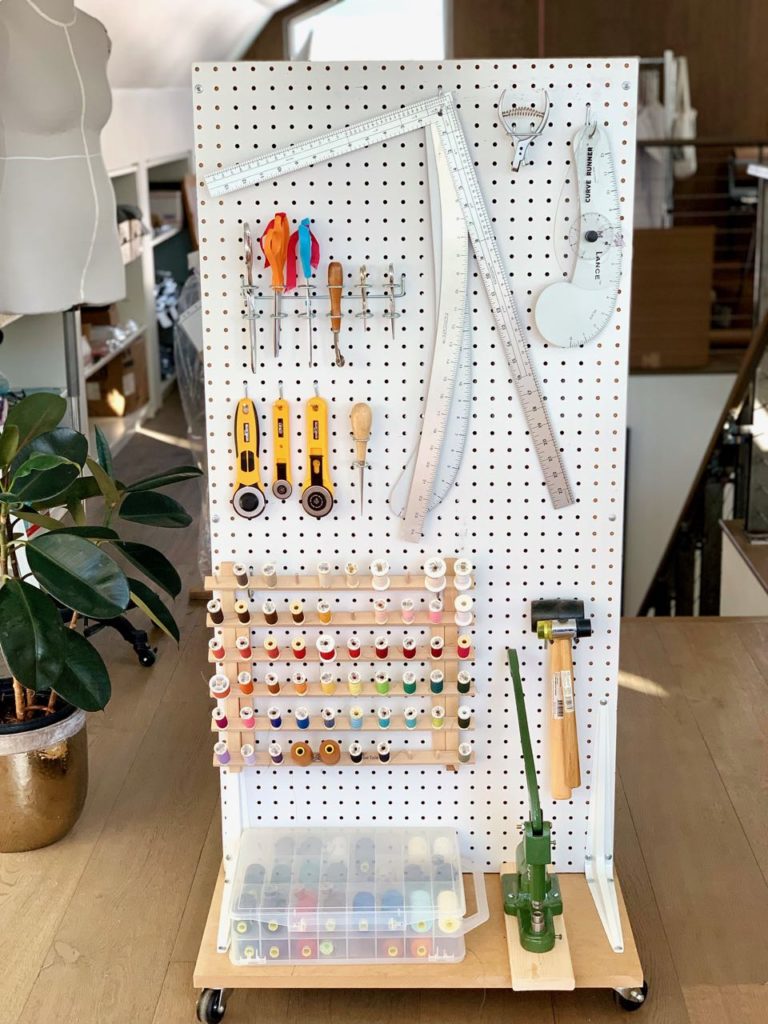
The pegboard accessories come with these handy plastic clips to keep them in place when you grab your tools. However, they are hard to reposition, so I’d recommend you do a trial run for a week or two with your tool layout before using the clips to secure.
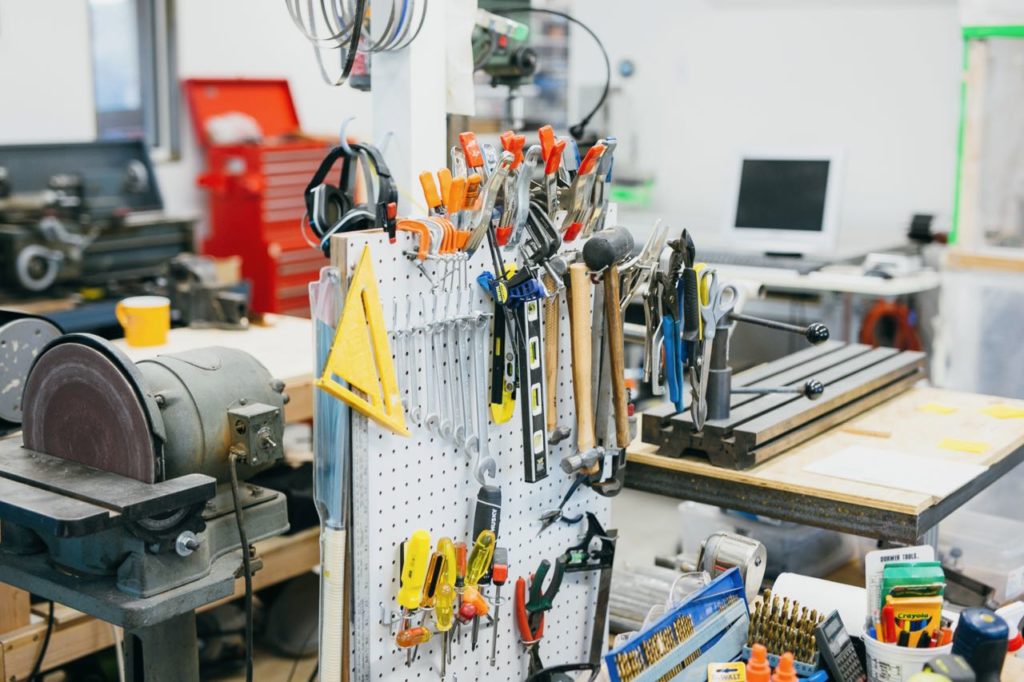 These rolling tool caddies have taken over our workshop. Nate has one downstairs in the machine shop and I’m thinking of making a bigger one for myself - a cork & whiteboard side for brainstorming and the other side filled with Beatrice fulfillment supplies.
I hope you’ll consider making one for yourself. It’s a wonderful addition to any sewing room - I can’t imagine working without mine!
Happy making! :)
Alison
These rolling tool caddies have taken over our workshop. Nate has one downstairs in the machine shop and I’m thinking of making a bigger one for myself - a cork & whiteboard side for brainstorming and the other side filled with Beatrice fulfillment supplies.
I hope you’ll consider making one for yourself. It’s a wonderful addition to any sewing room - I can’t imagine working without mine!
Happy making! :)
Alison